Pi 101
Preparation
This page aims to run through the basics of getting a raspberry pi up and running along with some basic security. This is the base I use for whenever I'm testing new things, be they languages or software. Chances are good that if you find another page on something like wireguard I'm starting from where you will end up by following this page.
First things first this assumes that you have a Pi, specifically the
Raspberry Pi 4 Model B Rev 1.4 but if you have a different
version there should be minimal to no changes. Once you've got your hands on
the pi you're also going to need a suitable memory card. Faster and larger
memory cards are generally going to be better, but as we're going headless
8GB should be enough.
Once you've got your memory card you're going to want a computer that can read it and the OS to install on it which we are going to get from the Raspberry Pi Website. At time of writing the latest Pi OS Lite version is Bullseye. Here we are going with Pi OS as while there are other options this is the simplest. We're also going for the Lite version as we're going to connect via ssh and not worry about screens and other peripherals.
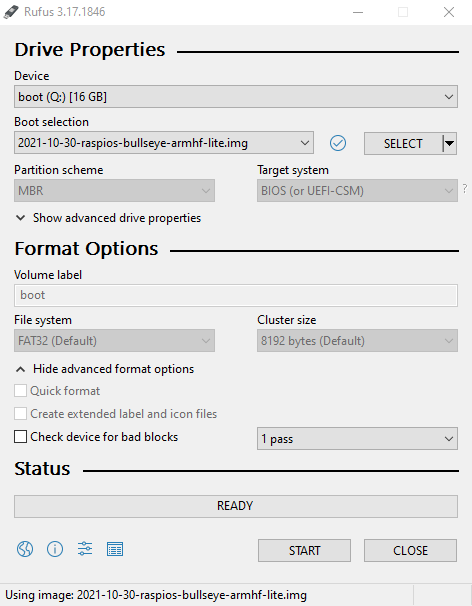
Once you've downloaded the OS from the previous link you're going to want to burn it to your sd card. I'm using Rufus on a windows machine as I assume this is going to be the easiest for most people, and chances are that people running Linux or other OS where Rufus is not available are going to be fine without guidance. Open Rufus and check for your sd card (in my case an 8GB card with drive letter Q).

Select the sd card and then the image that you downloaded (you may need to unzip it first so you have the actual .img) in Rufus and then click start. It will warn you (potentially twice) about destroying all data on the card, and then should finish writing to the card in short order. Once it's done close Rufus, but before removing the card open up disk management and assign a letter to the sd card.

Then access the sd card and add a file called ssh (no
extension) before ejecting the card.

Logging In
Insert the SD card into the pi with it powered off. If you have not already done so attach an ethernet cable to it, and then plug in the power cable to turn it on.
The Pi will take up to a few minutes to power on and undergo the necessary steps to be accessible via ssh, but once it has done so you will need to find out the IP address that has been assigned to it. You can do this in a couple of ways. The simplest is likely to use Fing or similar, but you can also use nmap, or (as I'm going to do) log into the router and find the IP address that has been assigned from there. Checking my router via the browser I can see under active DHCP Leases a device with the hostname raspberrypi and the IP address 192.168.0.186, so I'm going to note this down.
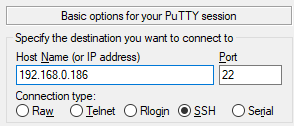
Once you have the IP address you may need to install PuTTy if you do not have it installed by default (I can't recall if it comes bundled or not). Start PuTTy and under "Host Name (or IP address)" type in the IP address from earlier leaving the port as 22.

Click "Open" and you should see a terminal that asks for your username and
password. Use the default username:pi and the
password:raspberry. Note you will not see any characters on
screen when typing the password, this is normal and is a security feature.

Once you have successfully logged in you will see a warning about the default password being used and likely another warning about Wi-Fi not being enabled. I'm ignoring the later as I have no need for Wi-Fi, and we're going to be sorting the password issue shortly. First though let's update everything using:
sudo apt update && sudo apt upgrade -y
This checks for the latest packages, and then once done will grab and
install the newest versions without prompting as we've specified
-y. Now's a good time to go get some water or stretch your legs
as this may take a little while.
Once this has finished it's time to start sorting out our user. We could create a new user, but I'm going to rename the current one instead. First lets create a temporary user and give it sudo privileges.
sudo useradd temp && sudo passwd temp && sudo usermod -aG sudo temp
Then close out current session and open a new one, logging in with out temporary user. Once logged in change the username, group and home directory from pi to one of your choice (dino in my case):
sudo usermod -l dino pi && sudo groupmod --new-name dino pi && sudo usermod -m -d /home/dino dino
Once we're done here close the session, and log back in again using your
newly renamed dino user (the password is still raspberry).
Delete the temporary user:
sudo userdel temp
Then update your password:
passwd
For now that's the (very) basics covered. In future I'll likely come back to this and look at adding ssh certificates and mounting external storage for a samba share. Past that it'll likely be specific articles.

